Basic Windows Setup
There are several Windows settings you should review before proceeding. If you don’t feel comfortable following the instructions below, consider seeking help from a friendly Windows expert.
Handle the Windows Paranoia
Windows 10 and 11 enforce strict software installation controls called Smart Application Control (SAC), which might make software installation more difficult or even block it. The reality is that SAC follows a “Zero Trust” philosophy. In practice, that means extreme digital paranoia.
To avoid problems, it is advisable to disable SAC before EVOLUTION installation.
Using Windows 11, turn off Smart App Control: Settings > Privacy & security > Windows Security > App & browser control, click on Smart App Control settings, and then select the “Off” radio button.
Then, also for Windows 11, turn off SmartScreen reputation-based protection, Settings > Update & Security > Windows Security > App & browser control. Click on Reputation-based protection settings, then deactivate the “Check apps and files” toggle switch.
Using Windows 10, turn off SmartScreen reputation-based protection, Settings > Update & Security > Windows Security > App & browser control > Reputation-based protection settings, then deactivate the “Check apps and files” toggle switch.
Remote Desktop
Enable Windows to accept Remote Desktop Protocol connections. This is crucial if you are connecting a tablet that functions as a wireless display on the deck.
If you’re using Windows 11, select Settings > System > Remote Desktop. Turn on “Remote Desktop” and check “Require devices to use Network Level Authentication…“.
In Windows 10, select Settings > System > Remote Desktop. Turn on “Enable Remote Desktop“. After confirmation, check both checkboxes below.
If you are on Windows 7, click Start, right-click “Computer”, select “Properties”, and then click “Remote Settings” in the left panel. In the “Remote” tab, click “Allow connections from computers running any version of…”. Click OK.
Don’t go to sleep!
Avoid the sleep state when the lid is closed. This only applies to notebooks and keeps it working even when you close the display cover.
Windows 11: Settings > System > Power > “Lid, power & sleep button controls”. For “Plugged in” and “On battery“, select “Shutdown” for the power button, “Do Nothing” for the “Sleep button”, and “Lid Closed” options.
Windows 10: Settings > System > Power & sleep > “Additional power settings” > “Choose what closing the lid does.” Select “Do Nothing” for “When I close the lid”.
Windows 7: Start > Control Panel > Power Options > “Choose what closing the lid does.” Select “Do Nothing” for “When I close the lid”. Click “Save Changes“.
Is it time?
Avoid the sleep state and screen off by time-out. By default, Windows may enter a sleep state or turn off the display after a period of inactivity. This applies to notebooks and mini-PCs.
Windows 11: Settings > System > Power > “Screen sleep & hibernate timeouts.” For “Plugged in” and “On battery“, select “Never” for “Turn my screen off after“, “Make my device sleep after“, and “Make my device hibernate after“.
Windows 10: Settings > System > Power & Sleep. For Screen and Sleep, select “Never” for “When plugged in…” and “On battery power…”.
Windows 7: Start > Control Panel > “Power Options” > “Change plan settings“. For “Plugged in” and “On battery”, set “Dim the display”, “Turn off the display”, and “Put the computer to sleep” to “Never”. Click “Save Changes”.
Deal with the crazy mouse!
When Windows starts, it searches for a legacy serial mouse on any RS-232 port at a baud rate of 4800. Many marine instruments use this standard.
At startup, Windows can mistakenly identify an active USB GPS as a mouse, resulting in erratic cursor behavior. The best solution is to change a Registry setting:
- Press [Windows]+R. The Run dialog appears.
- Type “regedit” and press Enter.
- Click “YES” in the User Account Control dialog.
- Navigate to “KEY_LOCAL_MACHINE\SYSTEM\CurrentControlSet\Services\sermouse“.
- Find “Start” in the right panel.
- Double-click “Start“, set value to 4, and click “OK“.
- Exit the Registry Editor.
Note: Setting Start to 4 stops Windows from searching for serial mice.
Is .NET Framework 3.5 installed?
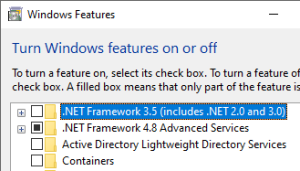 EVOLUTION needs this Windows feature. Sometimes, .NET Framework 3.5 is included; other times, you must enable it manually.
Windows 10/11: Search for “Turn Windows features on or off”. If the .NET Framework 3.5 box is not checked, check it and click “OK“. Windows will install it.
Windows 7: Use “Start” > Control Panel > “Programs and Features” > “Turn Windows features on or off“. If Microsoft .NET Framework 3.5.1 is not checked, check it and click “OK“.
If Windows needs to download .NET Framework 3.5, the computer should be connected to the Internet.
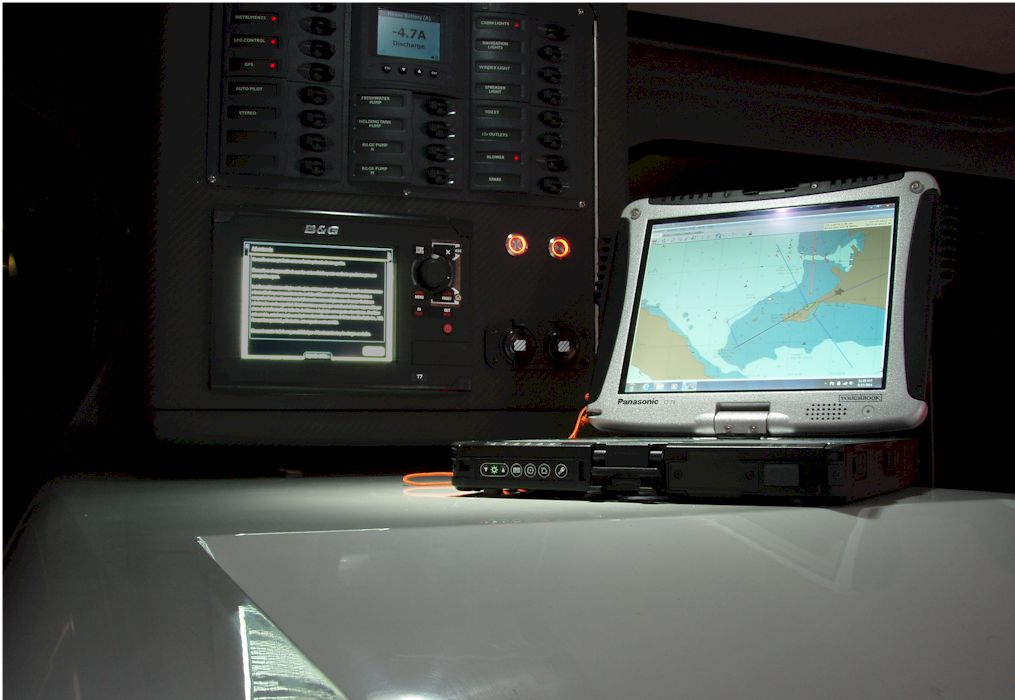
Wireless Deck Display
When it comes to short races, having tactical data on deck is crucial! The best way to achieve this is by using an Android or iOS tablet that wirelessly connects to the computer below deck.
Connecting the display on deck
A simple router is the best way to establish a connection between the tablet and the onboard computer. Select a 12VDC model that can draw power from the boat’s batteries.
- Set up the router’s Wi-Fi with a straightforward name and password.
- To enhance the Wi-Fi signal on deck, position the router below near where you’ll be using the wireless display. For carbon-fiber boats, we recommend a different setup. Don’t hesitate to contact us for more options!
- Connect the computer to the router using an Ethernet cable. It’s best to avoid Wi-Fi here, as it can double the bandwidth usage.
- Download and install Microsoft Remote Desktop, now available as a Windows App, from the Google Play Store or Apple App Store. This handy app lets you control the computer right from the deck!
- And now for the final steps! Connect the tablet to the router and set up a new desktop connection in the app.
You’re all set! Now, you can start using EVOLUTION from the wireless display.
Take your time to get familiar with Remote Desktop or Windows App. You’ll find plenty of helpful tutorials online, as it’s a popular application. If you need assistance, please contact us or your local Windows support team.
Software Install and Activate
Install
Installing EVOLUTION is quite simple. You may start by downloading the latest version.
If a previous version of EVOLUTION is present, you will need to uninstall it using the usual Windows procedure. Don’t worry; all your current configurations will be preserved.
Unzip the EVOLUTION Setup 3_x_yy.zip file. Then run setup.exe.
Activate
Activating EVOLUTION enables the exchange of data with the instruments. By acquiring a User License, you can activate EVOLUTION on a single computer, the onboard computer.
Yet, it is NOT necessary to activate EVOLUTION on other computers to download forecasts, review races, create courses, manage waypoints, etc.
Use the following instructions for the activation:
- Run EVOLUTION. Wait a few seconds, then check the folder Documents\My EVOLUTION; you will find a file with an extension “.req”, for example, evolution_0EKGASJ.req
- Copy and send the .req file to support@evolution-tactic.com
- We will send you back a file with a “.lic” extension, for instance, evolution_0EKGASJ‑0EKGAW8.lic
- Copy the “.lic” file to the “My EVOLUTION” folder.
- Rerun EVOLUTION to complete the activation.
Once done, this procedure deletes the “. lic” file from the My EVOLUTION folder.
Please do not rename, open, or alter the content of the “.req” and “.lic” files; otherwise, activation will fail. It is advisable to create a backup copy of both files, as you may need them again if you have to reinstall Windows and EVOLUTION on the same computer.
Next Steps
Now that EVOLUTION is installed, there are a few more steps before we can start sailing:
Buy C-MAP nautical charts
Before using EVOLUTION on your boat, you will need charts of the region you sail. You will find a detailed guide in this article.
Create your boat’s configuration
You probably notice that when you open EVOLUTION, the active boat is ARG-5000 Fortuna 3. It is available as a demo, allowing you to try out some of the system’s offline features.
Since there are numerous possible instrument alternatives, including brands, models, versions, and methods of connection to the onboard computer, we offer your boat’s configuration as a complimentary service. This includes creating the polar curves using the best data available.
We will provide preconfigured files specific to your boat, which you can load and select on your computer.
Calibrate the instruments
After testing that EVOLUTION receives data from the instruments, the next step is checking that the compass, wind, and boat-speed sensors are measuring correctly. This requires a set of unique procedures, which are the topic of other articles.
Relying upon well-calibrated sensors is an ongoing issue, so the team member responsible for the boat’s electronics should learn to keep them working correctly.